Problem
- There is no access to Microsoft default sharing folder Admin$ and for this reason, the possibility of using discovery and remote installation is not available on the Padvish console. How we can install Padvish on the network.
- How we can distribute and install Padvish with a group policy option in a Windows active directory?
- Is there any method to make an MSI installation file from Padvish antivirus?
Reason
Making msi installation file from Padvish agent is functional to install on the network, especially when Push Install (Remote install) requirements (such as Port 445 being open and accessing to Admin$) does not exist.
- Padvish installation agent file: this is the same file in the Padvish management console and uploaded as Upload Push Install Agent and in fact, this is the Padvish silent installation (without user interface). This installation program contains Agent in its name. (For instance: PadvishTSAgent_En v2.5.267.3764.exe.
- Rgc installation settings file: made by Generate Install Config option in Padvish management console.
- A software to convert exe to MSI: it is downloadable online. For instance, in this guide, we used MSI_Wrapper_Pro_8_0_26
During doing this, pay attention that the msi built file should also contain an rgc file that the antivirus can find its server address and register under it. As a result, first, the antivirus installation file must add to a folder alongside the rgc file and then convert to msi with the mentioned software.
Step to step guide
This section describes the steps to assume that the MSI_Wrapper_Pro_8_0_26 software is installed:
- First, make the rgc file with Padvish console and put it inside the folder alongside the agent file and then run MSI_Wrapper_Pro_8_0_26 and click on Next.

- Fill the blanks just like the image and click on the Next button. ( the name of the agent file changed to PadvishTSAgent.exe and put in the msi folder alongside the rgc file)

- Adjust the demanded information as the following image:

- Select the Create Now button and then click Next

- Complete the demanded information in the following image. (Product Icon settings is optional)

- On the next page, just click on the Next button.

- On the next page click on Advanced

- In the opened window fill the demanded settings as follows and click OK

- Click on next again

- In the next window click on Next

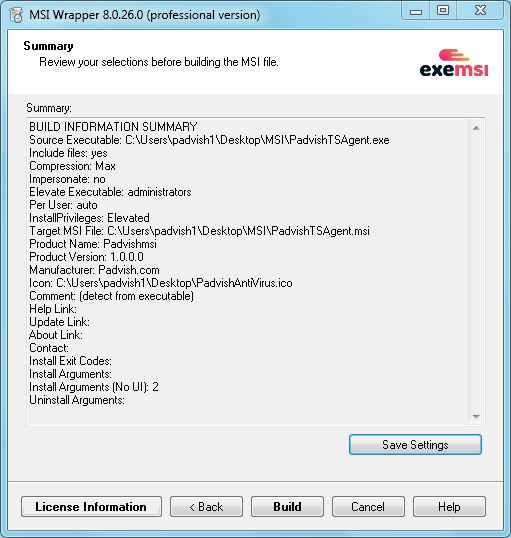
- In the next window, click on the Build button.

- In the next window, click on the Open Folder button (below)

- The msi file is ready to install.
Test this file on a system and in case you were successful, you can use it to install Padvish by active directory or other methods.